The Fornax Science Console is a robust tool for scientific research. This quick-start guide introduces the basic steps to begin using it effectively.
1. Get an Account
To create a free Fornax Science Console and Community Forum account, complete the form at:
The form will ask for the following:
Name, email address, and phone number. We use these for verification purposes only. You will need access to both your email and phone in order to complete the registration process. Your email address will also be used for ongoing Multi-Factor Authentication (MFA), so please choose one that receives messages quickly and reliably. Please use a standard cell phone or landline; you will not be able to activate your account using a VoIP phone (Voice over Internet Protocol phone).
Institute affiliation and career stage, for demographics.
A brief description of the science analysis you would like to use Fornax for. We use this to verify that the proposed usage of Fornax is appropriate.
Desired username and password.
Once you submit the form, a verification link will be sent to your email address. Click the link to verify your email address and then follow the instructions to verify your phone number.
A human will then review your request. If approved, your account will be created and you will receive an email with further instructions and information, including the User Agreement and User Resource Allotments and Costs.
If you have trouble getting an account, please contact the Helpdesk.
2. Log In
Once your account has been created, log in to the Fornax Science Console:
After submitting your username and password, you will be prompted for a Multi-Factor Authentication (MFA) code. The code will be automatically emailed to the address you used when registering your account.
Once logged in, you will see the Dashboard with navigation links on the left and your account’s resource and credit usage in the main area, similar to this:

Fornax Science Console Dashboard
You can log out at any time by clicking the Logout button at the top right. You will be automatically logged out after 24 hours.
3. Start a Server Session
To start a compute session, go to the left-hand menu on the Dashboard and choose Compute → JupyterHub.
A new window will open and you will be prompted to choose a Server Type.
Please choose Small until you have carefully read Server Options.
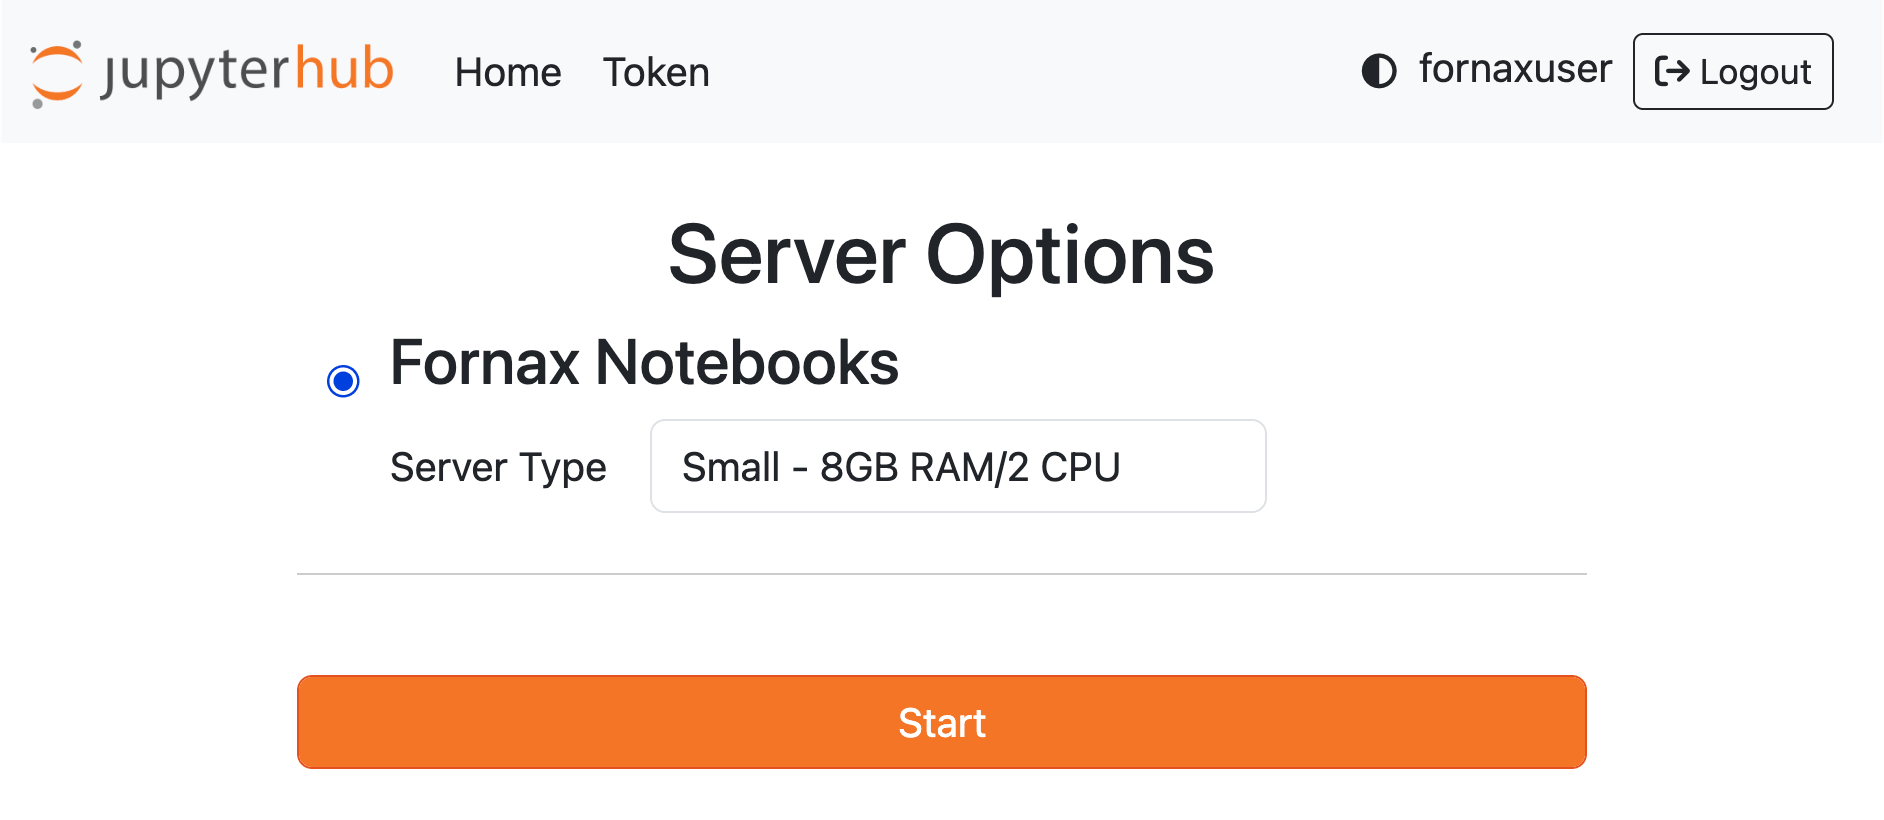
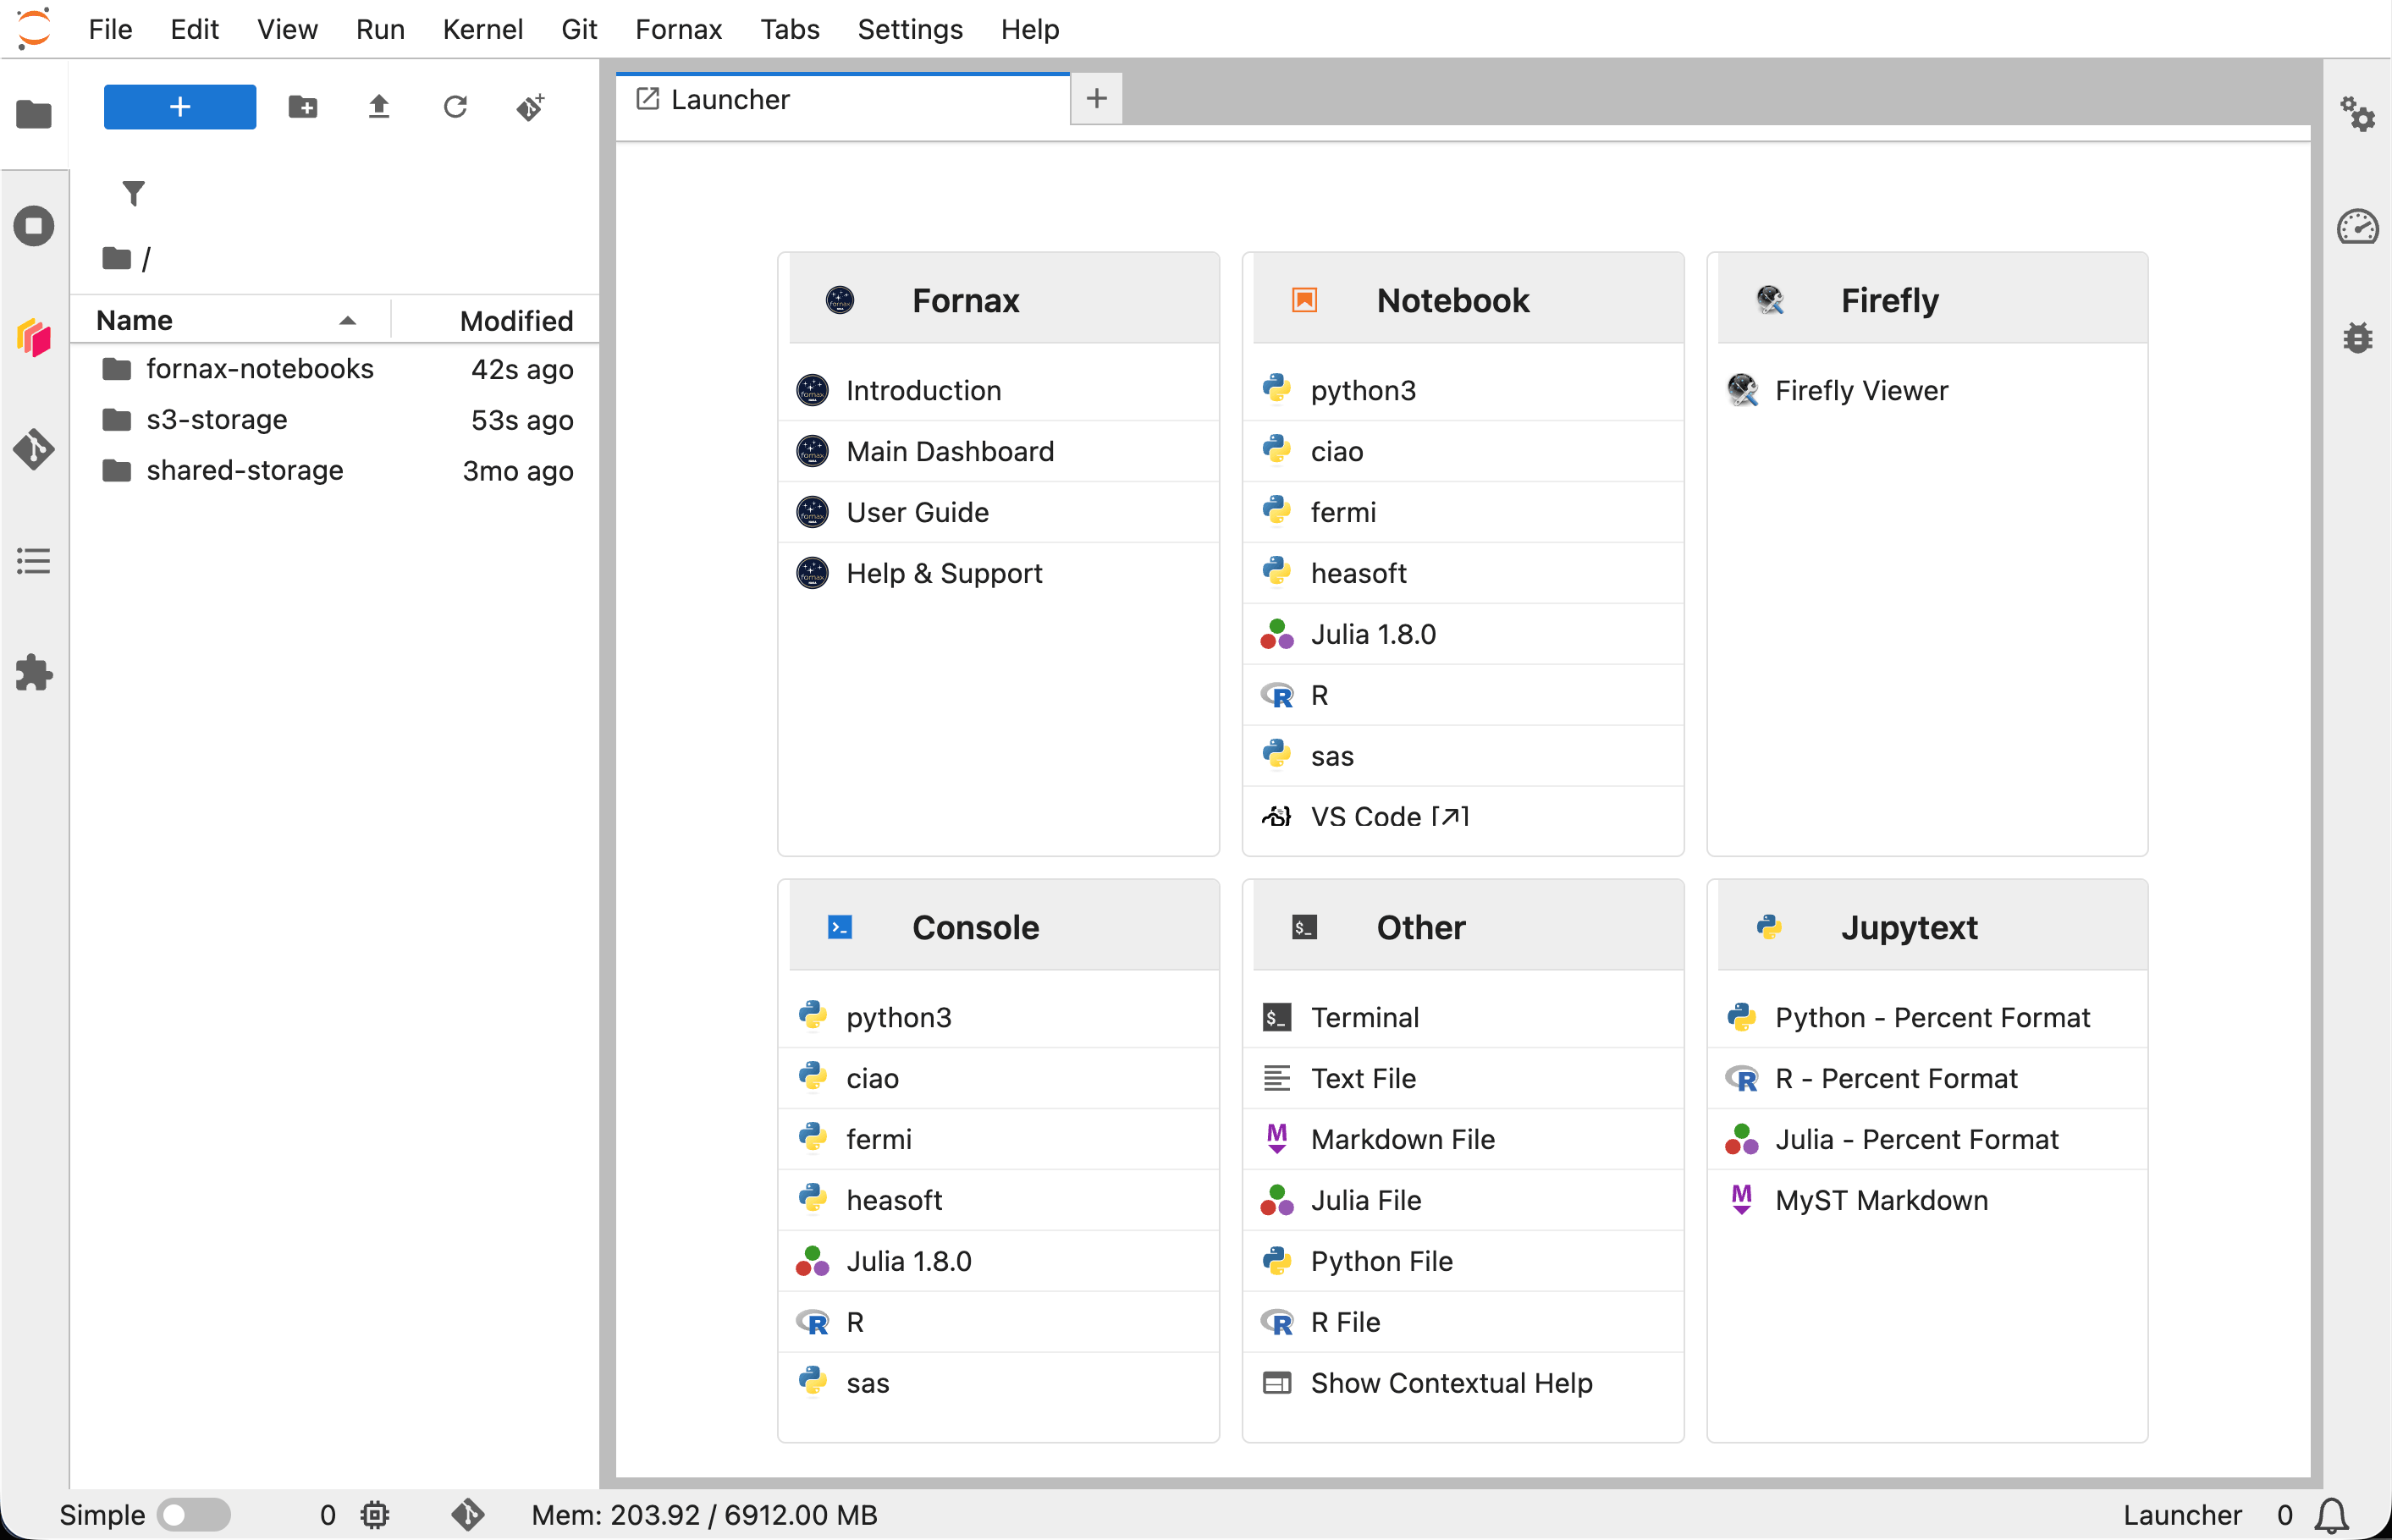
Click Start to launch your server. It is normal for it to take a couple of minutes. Once your server has started, you will see a JupyterLab interface similar to this:
At this point, the selected server will begin charging against your credit allotment, even though no computations have started yet. Since you have chosen the Small server, the associated credit usage will be low.
4. Open a New Notebook
In JupyterLab, you will see a main menu at the top, your persistent home directory on the left, and a work area on the right. The Launcher tab is open in the work area by default. You can click the + to the right of the tab name just under the main menu to open a new Launcher tab at any time.
To start a new Jupyter Notebook:
In the Launcher tab, select python3 under the Notebook section. A new notebook tab will open in the work area.
When you are ready to save your work to your Fornax home directory, click on the Save icon in the notebook tab.
To download your notebook to your local machine, click on your notebook in your home directory on the left side of the screen. Then go to the main menu and select
File → Download.
5. Shut Down Your Server
Since a running session continuously uses your allocated credits, it is strongly recommended to terminate your session when you are done using it for awhile. Be sure to save your work to your persistent home directory before doing this. Anything not saved will be lost, including both files and software customizations. See Install Additional Software - Update an Existing Environment for information about how to install software that persists between sessions.
To stop your session:
Navigate to the JupyterHub control panel page by clicking
Fornax → Shutdown Serverin the top menu bar (equivalently, clickFile → Hub Control Panel).On the control panel page, click Stop My Server.